70 KiB
StumpWM config
Introduction
What is StumpWM?
StumpWM is a tiling window manager inheriting from RatPoison, written entirely in Common Lisp and compiled with SBCL. While it is not an dynamic tiling window manager like Awesome is, its ability of managing windows in frames and using keychords with keymaps like Emacs does is a huge plus for me, not to mention the fact its configuration file is written in Common Lisp, a general programming language, a bit like Awesome. This makes it an i3 on steroids, sort of. It also uses a lot of Emacs’ concepts, which is great for an Emacs user such as myself.
Why not EXWM then?
Sometimes, some actions within Emacs are blocking actions, making the computer not usable while the command runs. It also does not play nice with video games (pun intended), which is also a negative point for me. And I also find EXWM more confusing overall than StumpWM.
What this file is for
This file has two main goals:
- This will be the actual source code of my StumpWM
configuration, thanks to Emacs’ org-mode, and thanks to org-mode’s
literate config capabilities.
Almost all of the visible source blocks if not all will be included
in my configuration files through tangling, which can be done in
Emacs when this file is opened through
M-x org-babel-tangle, which will write my configuration files based on the source blocks present in this document. This file is not only my config’s documentation, it is my configuration. - Be my documentation on my StumpWM configuration. That way, I’ll never forget which block of code does what. And maybe, hopefully, someone could learn a thing or two if they want to get into StumpWM but don’t know where to begin. You should be able to read this document as a book, with each chapter dedicated to a different aspect of StumpWM.
Organization of my files
While I could make this file write everything to the same file (the actual source will be in a single file after all), I find it easier to debug StumpWM if everything’s split up. For now, my configuration follows this architecture:
-
init.el - My main configuration file, glues everything together. It loads all of my configuration files as well as some modules I find useful;
-
colors.lisp - This file defines colors that will be used in my
theme.lispandmodeline.lispfiles. Let’s make my code DRY, or as I prefer to say, DRYD (Don’t Repeat Yourself Dummy). -
commands.lisp - Lisp commands, in case I want to bind some complicated actions to a keybind that is not just a simple shell command;
-
keybindings.lisp - My list of keymaps and keybinds which make StumpWM actually usable;
-
modeline.lisp - This defines the modeline, a concept taken from Emacs which can display various information such as a list of workspaces, including the current one;
-
placement.lisp - This file manages my workspaces and the default placement of various windows;
-
utilities.lisp - Here you can find my StumpWM configuration that isn’t really related to the rest of the config, for instance utility code for connecting by SSH to some host.
-
theme.lisp - manages the color theme of StumpWM, the default placement of some windows and StumpWM’s gaps.
You will also find below my xinit file for StumpWM, exported to
$HOME/.xinitrc.stumpwm, which I use to start Stump through startx
~/.xinitrc.stumpwm.
#!/bin/sh

# this makes it work in Ubuntu
xhost +SI:localuser:$USER

# Set fallback pointer
xsetroot -cursor_name left_ptr

# Fix scrolling on some GTK3 applications
export GDK_CORE_DEVICE_EVENTS=1

# in case Java applications display /nothing/
# wmname LG3D
# export _JAVA_AWT_WM_NONREPARENTING=1

exec stumpwm
Init file
As mentioned in the documentation, the configuration files can be in
different locations, but I chose an Emacs-like configuration: put
everything in ~/.stumpwm.d/. We begin by indicating quicklisp how to
properly initialize:
#-quicklisp
(let ((quicklisp-init (merge-pathnames "quicklisp/setup.lisp"
                                       (user-homedir-pathname))))
  (when (probe-file quicklisp-init)
    (load quicklisp-init)))
Then, our first StumpWM-related code is declaring we are using the
stumpwm package, and this is also our default package. This will allow
us to avoid using the prefix stumpwm: each time we are using a
function or a variable from this package.
(in-package :stumpwm)
(setf *default-package* :stumpwm)
Since I install StumpWM with my package manager (I use the AUR’s
stumpwm-git package), StumpWM’s modules are installed to
/usr/share/stupmwm/contrib/utils/, let’s indicate that to StumpWM.
(set-module-dir "/usr/share/stupmwm/contrib/")
A startup message can be used when initializing StumpWM. For now,
let’s set it to nil.
(setf *startup-message* nil)
The first thing I want to do after that is to set some decent cursor
pointer as well as get a bunch of stuff started. To see what’s in the
autostart script, see here.
(run-shell-command "xsetroot -cursor_name left_ptr")
(run-shell-command "sleep 1 && autorandr vertical && autorandr horizontal && autostart")
Now, we’ll load a couple of my custom files that will be described below:
| File to be loaded |
|---|
| bluetooth.lisp |
| commands.lisp |
| placement.lisp |
| keybindings.lisp |
| theme.lisp |
| utilities.lisp |
| modeline.lisp |
(mapconcat (lambda (file)
             (format "(load \"~/.stumpwm.d/%s\")" (car file)))
           files
           "\n")
This is equivalent to the Common Lisp code:
(load "~/.stumpwm.d/bluetooth.lisp")
(load "~/.stumpwm.d/commands.lisp")
(load "~/.stumpwm.d/placement.lisp")
(load "~/.stumpwm.d/keybindings.lisp")
(load "~/.stumpwm.d/theme.lisp")
(load "~/.stumpwm.d/utilities.lisp")
(load "~/.stumpwm.d/modeline.lisp")
Once the modeline file is loaded, let’s indicate StumpWM to activate it:
(when *initializing*
  (mode-line))
Another thing I want to set is how focus is linked to my mouse: only on click. I HATE it when focus follows my mouse like some damn dog after its ball. Also, the meta key will be used to move floating windows.
(setf *mouse-focus-policy*    :click
      ,*float-window-modifier* :META)
Next, some modules will be loaded from the stumpwm-contrib package
(which is included in stumpwm-git in the AUR). Here is a short list
including a short description of what they are for:
| Module Name | Why It Is Loaded |
|---|---|
| beckon | Bring the mouse cursor to the current window |
| end-session | Gracefully end programs when ending user session |
| globalwindows | Navigate between windows from all workspaces |
| mpd | Interact with MPD |
| stump-backlight | Native management of backlight in StumpWM |
| urgentwindows | Get urgent windows |
(mapconcat (lambda (module)
             (format "(load-module \"%s\")" (car module)))
           modules
"\n")(load-module "beckon")
(load-module "end-session")
(load-module "globalwindows")
(load-module "mpd")
(load-module "stump-backlight")
(load-module "urgentwindows")In order to be able to use MPD from StumpWM itself, we’ll need to connect to it.
(mpd:mpd-connect)Finally, we can notify the user everything is ready.
(setf *startup-message* "StumpWM is ready!")And it’s done! We can now move on to the creation of the other CLisp files.
Commands
The first command I declare in this file is a command that will avoid me invoking too many Firefox instances. Either Firefox is not already running and an instance is launched, or one already is and we are brought to it. This is done like so:
(defcommand firefox () ()
            "Run or raise Firefox."
            (run-or-raise "firefox" '(:class "Firefox") t nil))
Next, this command will not only close the current window, but it will also close the current frame.
(defcommand delete-window-and-frame () ()
            "Delete the current frame with its window."
            (delete-window)
            (remove-split))
The two following commands will create a new frame to the right and below the current frame respectively, then focus it.
(defcommand hsplit-and-focus () ()
            "Create a new frame on the right and focus it."
            (hsplit)
            (move-focus :right))

(defcommand vsplit-and-focus () ()
            "Create a new frame below and move focus to it."
            (vsplit)
            (move-focus :down))
Now, let’s create a command for invoking the terminal, optionally with a program.
(defcommand term (&optional program) ()
            "Invoke a terminal, possibly with a @arg{program}."
            (run-shell-command (if program
                                   (format nil "kitty ~A" program)
                                   "kitty")))
And done! Next!
Colors
If you’ve taken a look at the rest of my dotfiles, you may have noticed I really like the Nord theme. No wonder we can find it here again! Here is a small table listing the Nord colors:
| Name | Value |
|---|---|
| nord0 | #2e3440 |
| nord1 | #3b4252 |
| nord2 | #434c5e |
| nord3 | #4c566a |
| nord4 | #d8dee9 |
| nord5 | #e5e9f0 |
| nord6 | #eceff4 |
| nord7 | #8fbcbb |
| nord8 | #88c0d0 |
| nord9 | #81a1c1 |
| nord10 | #5e81ac |
| nord11 | #bf616a |
| nord12 | #d08770 |
| nord13 | #ebcb8b |
| nord14 | #a3be8c |
| nord15 | #b48ead |
I’ll prefix the variables’ name with phundrak- just in case it might
conflict with another package I might use in the future, so the CLisp
code looks like so:
(mapconcat (lambda (color)
             (format "(defvar phundrak-%s \"%s\")" (car color) (cadr color)))
           colors
"\n")(defvar phundrak-nord0 "#2e3440")
(defvar phundrak-nord1 "#3b4252")
(defvar phundrak-nord2 "#434c5e")
(defvar phundrak-nord3 "#4c566a")
(defvar phundrak-nord4 "#d8dee9")
(defvar phundrak-nord5 "#e5e9f0")
(defvar phundrak-nord6 "#eceff4")
(defvar phundrak-nord7 "#8fbcbb")
(defvar phundrak-nord8 "#88c0d0")
(defvar phundrak-nord9 "#81a1c1")
(defvar phundrak-nord10 "#5e81ac")
(defvar phundrak-nord11 "#bf616a")
(defvar phundrak-nord12 "#d08770")
(defvar phundrak-nord13 "#ebcb8b")
(defvar phundrak-nord14 "#a3be8c")
(defvar phundrak-nord15 "#b48ead")Finally, let’s also modify the default colors StumpWM has. I’ll try to respect the original colors while converting them to Nord. We also need to reload them now that we modified them.
(setq *colors*
      `(,phundrak-nord1   ;; 0 black
        ,phundrak-nord11  ;; 1 red
        ,phundrak-nord14  ;; 2 green
        ,phundrak-nord13  ;; 3 yellow
        ,phundrak-nord10  ;; 4 blue
        ,phundrak-nord14  ;; 5 magenta
        ,phundrak-nord8   ;; 6 cyan
        ,phundrak-nord5)) ;; 7 white

(when *initializing*
  (update-color-map (current-screen)))
And with that we’re done!
Mode-Line
The timeout of the modeline indicates how often it refreshes in seconds. I think two seconds is good.
(setf *mode-line-timeout* 2)Formatting Options
Next we get to the content of the modeline. This format follows the
format indicated in the manpage of date.
(setf *time-modeline-string* "%F %H:%M")Let’s also indicate how the groupname is displayed.
(setf *group-format* "%t")The window format should display first its window number, then its titled, limited to 30 characters.
(setf *window-format* "%n: %30t")Mode-Line Theme
The modeline is pretty easy. First, let’s load the colors.lisp file we just created:
(load "~/.stumpwm.d/colors.lisp")Next, we can set some colors for the modeline. Let’s set the background of the modeline to Nord1 and the foreground to Nord5, I think this is a pretty good combination.
(setf *mode-line-background-color* phundrak-nord1
      ,*mode-line-foreground-color* phundrak-nord5)
We could also use some borders in the modeline. But we won’t. Let’s still set its color to Nord1, just in case.
(setf *mode-line-border-color* phundrak-nord1
      ,*mode-line-border-width* 0)
Mode-Line Modules
Here are some modules that we will load for the modeline:
| Module Name | Why Do I Need It? |
|---|---|
| battery-portable | Get information on the battery level of a laptop |
| cpu | Get the CPU usage |
| mpd | Display MPD’s status |
| mem | Get the memory usage |
| net | Display network usage |
| wifi | Display information about Wifi connectivity |
(mapconcat (lambda (module)
             (format "(load-module \"%s\")" (car module)))
           modules
"\n")(load-module "battery-portable")
(load-module "cpu")
(load-module "mpd")
(load-module "mem")
(load-module "net")
(load-module "wifi")We need to set some variables so modules can be displayed correctly. Note that the character between the font switchers in the second CPU formatter is U+E082, which symbolizes the CPU.
(setf cpu::*cpu-modeline-fmt* "%c"
cpu::*cpu-usage-modeline-fmt* "^f2^f0^[~A~2D%^]"
mem::*mem-modeline-fmt* "%a%p"
wifi:*wifi-modeline-fmt* "%e %P"
wifi:*use-colors* nil
mpd:*mpd-modeline-fmt* "%a - %t"
mpd:*mpd-status-fmt* "%a - %t"
,*hidden-window-color* "^**"
,*mode-line-highlight-template* "«~A»")Generating the Mode-Line
We can indicate what to display in our modeline. Each formatter will
be separated by a Powerline separator with the code point 0xE0B0 in
the font I am using (see §#Theme-Fonts-28pc8141v5j0).
| Formatter | What it does | Command? |
|---|---|---|
%g |
Display list of groups | |
%W |
Display list of windows in the current group and head | |
^> |
Rest of the modeline align to the right | |
mu-unread |
Display number of unread emails | yes |
%m |
Display current MPD song | |
%I |
Display Wifi status | |
%l |
Display network usage | |
%C |
Display CPU usage | |
%M |
Display RAM usage | |
%B |
Display battery status | |
%d |
Display date |
(("%g") ("%W") ("^>") ("mu-unread" . t) ("%m") ("%I") ("%l") ("%C") ("%M") ("%B") ("%d"))
(defvar *mode-line-formatter-list*
  '<<modeline-format-gen()>>
  "List of formatters for the modeline.")
As you can see, generate-modeline generates the string defining
*screen-mode-line-format* from the list of formatters we gave it with
the table /phundrak/dotfiles/src/commit/2dfabd7d564d6dab28212b3f530b2343eb72b6d8/org/config/modeline-format.
(defun generate-modeline (elements &optional not-invertedp)
"Generate a modeline for StumpWM.
ELEMENTS should be a list of `cons'es which `car' is the modeline
formatter or the shell command to run, and their `cdr' is either nil
when the `car' is a formatter and t when it is a shell command."
(when elements
(cons (if not-invertedp
(format nil
" ^(:fg \"~A\")^(:bg \"~A\")^f1^f0^(:fg \"~A\") "
phundrak-nord1
phundrak-nord3
,*mode-line-foreground-color*)
(format nil
" ^(:fg \"~A\")^(:bg \"~A\")^f1^f0^** "
phundrak-nord3
phundrak-nord1))
(let* ((current-element (car elements))
(formatter (car current-element))
(commandp (cdr current-element)))
(cons (if commandp
`(:eval (run-shell-command ,formatter t))
(format nil "~A" formatter))
(generate-modeline (cdr elements) (not not-invertedp)))))))It is then easy to define a command that can call this function and set this variable so we can sort of reload the mode-line.
(defcommand reload-modeline () ()
            "Reload modeline."
            (setf *screen-mode-line-format*
                  (cdr (generate-modeline *mode-line-formatter-list*))))
And actually, let’s reload the modeline immediately.
(reload-modeline)Groups and placement
I’ve been used to ten groups, or workspaces, or tags, since I began using tiling window managers. I shall then continue this habit. Here is the list of groups I will be using:
| Groups | Number | Windows | Type |
|---|---|---|---|
| [DEV] | 1 | ||
| [PRIV] | 4 | ||
| [WWW] | 2 | ||
| [FILES] | 3 | Nemo |
(let ((make-group (lambda (group &optional first-p)
                    (let ((group-name (car group))
                          (group-type (nth 3 group)))
                      (format "%S" `(,(if first-p 'grename
                                        (pcase group-type
                                          ("Dynamic" 'gnewbg-dynamic)
                                          ("Floating" 'gnewbg-float)
                                          (otherwise 'gnewbg)))
                                     ,group-name))))))
  (string-join `(,(funcall make-group (car groups) t)
                 ,@(mapcar (lambda (group)
                             (funcall make-group group))
                           (cdr groups)))
               "\n"))
(grename "[DEV]") (gnewbg "[PRIV]") (gnewbg "[WWW]") (gnewbg "[FILES]")
Groups are specified this way:
(when *initializing*
  <<gen-groups()>>)
By default, if nothing is specified as per the group type, my groups are manual tiling groups. Otherwise, as you can see above, they can also be dynamic tiling groups or floating groups.
Next, let’s make sure no previous window placement rule is in place, this will avoid unexpected and hard-to-debug behavior.
(clear-window-placement-rules)As you can see in the table /phundrak/dotfiles/src/commit/2dfabd7d564d6dab28212b3f530b2343eb72b6d8/org/config/list-groups above, I also indicated my window placement preferences. For now, they all rely on the window’s class, so it will be pretty straightforward to the corresponding code.
(require 'seq)
(let ((output "")
      (rules (seq-filter (lambda (rule) rule)
                         (mapcar (lambda (line)
                                   (let ((classes (caddr line)))
                                     (unless (string= "" classes)
                                       (cons
                                        (split-string classes "," t "[[:space:]]*")
                                        (car line)))))
                                 rules))))
  (progn
    (seq-do (lambda (rule)
              (let ((classes (car rule))
                    (group   (cdr rule)))
                (dolist (class classes)
                  (setf output (format "%s\n%s"
                                       `(define-frame-preference ,(format "\"%s\"" group)
                                          (nil t t :class ,(format "\"%s\"" class)))
                                       output)))))
            rules)
    output))
This can be written this way:
(define-frame-preference "[FILES]" (nil t t :class "Nemo"))Dynamic groups, if any is created, should have a split ratio of half of the available space.
(setf *dynamic-group-master-split-ratio* 1/2)Theme
As in the modeline file, the first thing we’ll do is to load our colors.
(load "~/.stumpwm.d/colors.lisp")We can now go onto more serious business.
Fonts
This gave me quite the headache when I tried to set this up: in order
to use TTF or OTF fonts, we need to use the ttf-fonts module which
relies on the clx-truetype library. A few years back, it should have
been possible to get it installed with a call to src_lisp[:exports
code]{(ql:quickload :clx-truetype)}, but it is no longer available!
There’s a quickfix available while we wait for clx-truetype to be once
again available: clone it in quicklisp’s local projects. You will
obviously need to have quicklisp installed (for that, follow the
official instructions), then execute the following shell commands:
cd ~/quicklisp/local-projects/
git clone https://github.com/lihebi/clx-truetype.git
This will make clx-truetype available to quicklisp, and you can run
again
(ql:quickload :clx-truetype)Now that this is out of the way, let’s add two lines so we can use TTF fonts:
(ql:quickload :clx-truetype)
(load-module "ttf-fonts")
The documentation says we should be able to also use OTF fonts, but so far I’ve had no luck loading one.
Loading more than one font to use some fallback fonts also doesn’t seem to work, unlike specified in the documentation (I wanted to use a CJK font, but it doesn’t appear to work), we need to manually change the font used which isn’t very user-friendly, especially if you might have CJK characters appear in otherwise regular text.
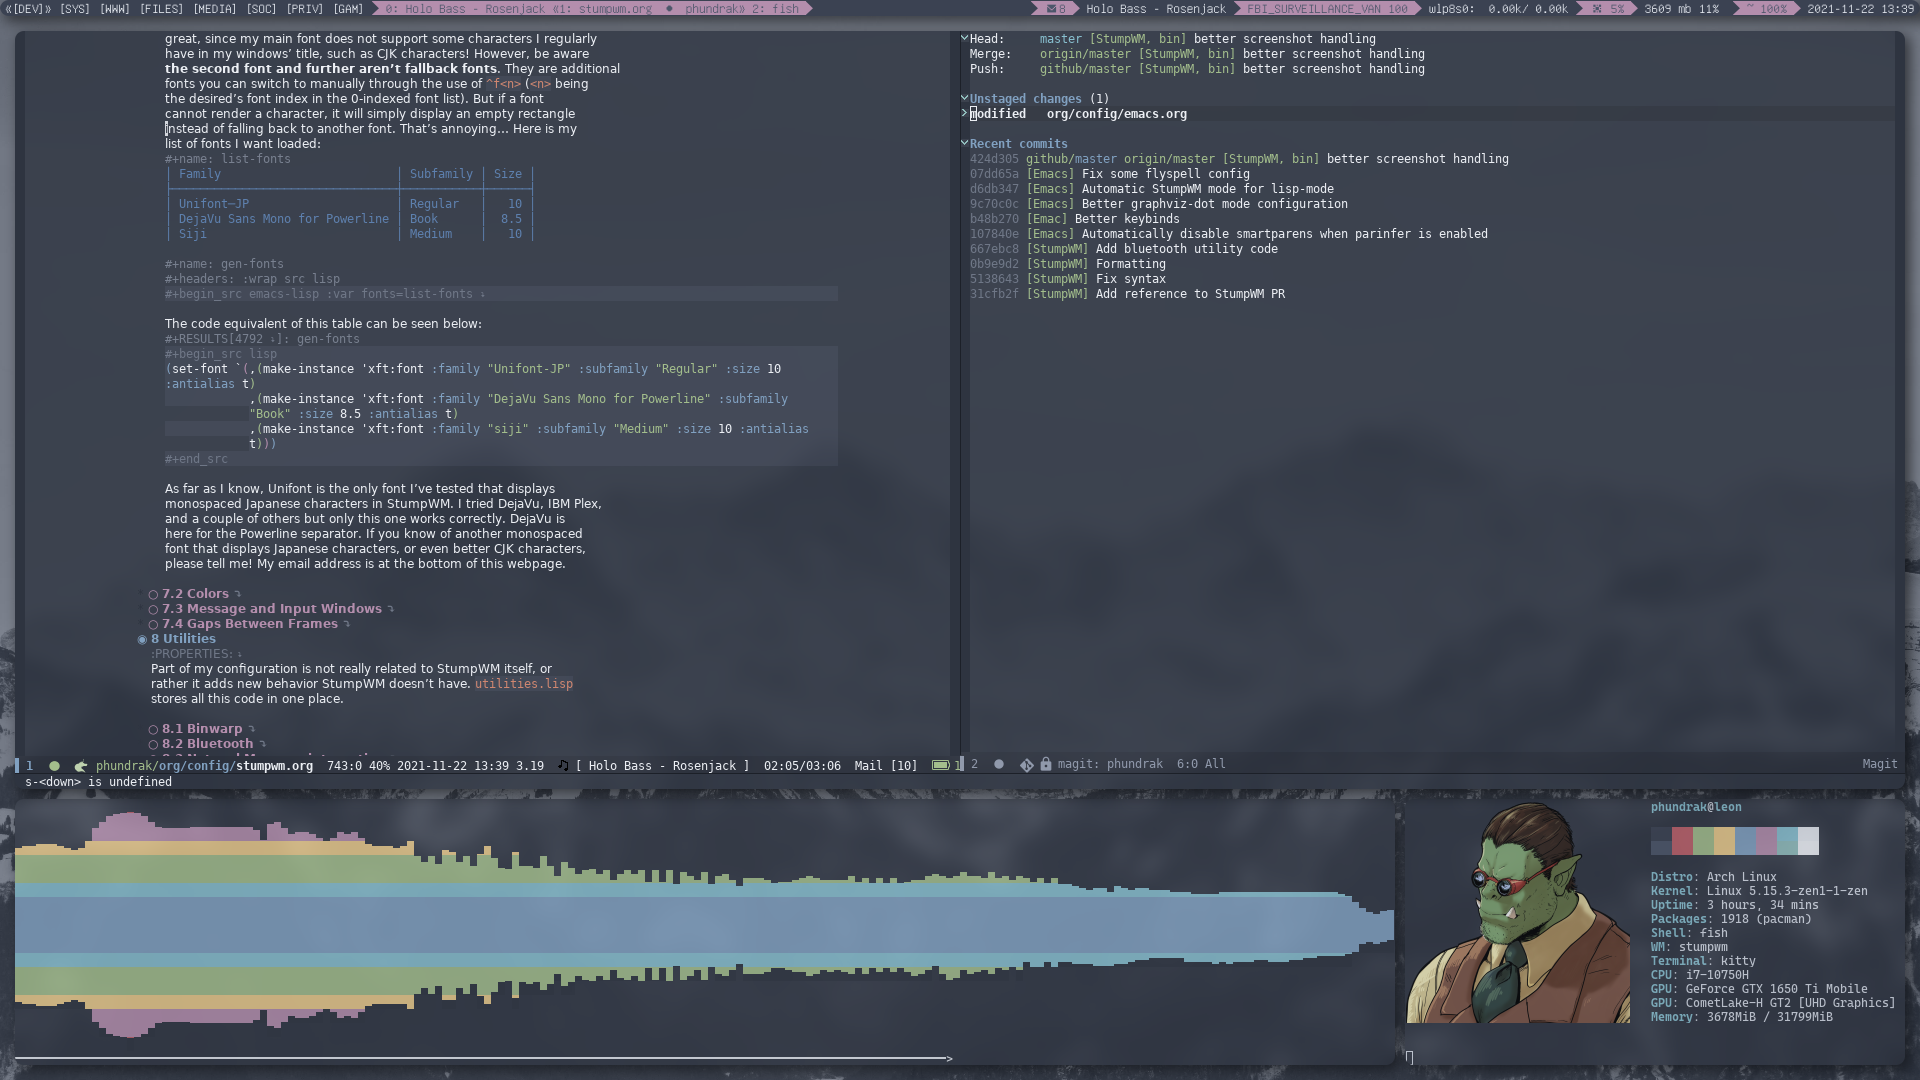
Something that didn’t click immediately for me (and I think StumpWM’s
documentation on this could be improved) is that set-font can be used
to set either one main font for StumpWM, as one might guess reading
the documentation — or you can set a list of them! And this is
great, since my main font does not support some characters I regularly
have in my windows’ title, such as CJK characters! However, be aware
the second font and further aren’t fallback fonts. They are additional
fonts you can switch to manually through the use of ^f<n> (<n> being
the desired’s font index in the 0-indexed font list). But if a font
cannot render a character, it will simply display an empty rectangle
instead of falling back to another font. That’s annoying… Here is my
list of fonts I want loaded:
| Family | Subfamily | Size |
|---|---|---|
| Unifont-JP | Regular | 10 |
| DejaVu Sans Mono for Powerline | Book | 8.5 |
| Siji | Medium | 10 |
(format "(set-font `(%s))"
        (mapconcat (lambda (font)
                    (let ((family    (nth 0 font))
                          (subfamily (nth 1 font))
                          (size      (nth 2 font)))
                      (format ",%s" `(make-instance 'xft:font
                                                    :family ,(format "\"%s\"" family)
                                                    :subfamily ,(format "\"%s\"" subfamily)
                                                    :size ,size
                                                    :antialias t))))
                  fonts
                  "\n            "))
The code equivalent of this table can be seen below:
(set-font `(,(make-instance 'xft:font :family "Unifont-JP" :subfamily "Regular" :size 10 :antialias t)
            ,(make-instance 'xft:font :family "DejaVu Sans Mono for Powerline" :subfamily "Book" :size 8.5 :antialias t)
            ,(make-instance 'xft:font :family "siji" :subfamily "Medium" :size 10 :antialias t)))
As far as I know, Unifont is the only font I’ve tested that displays monospaced Japanese characters in StumpWM. I tried DejaVu, IBM Plex, and a couple of others but only this one works correctly. DejaVu is here for the Powerline separator. If you know of another monospaced font that displays Japanese characters, or even better CJK characters, please tell me! My email address is at the bottom of this webpage.
Colors
We can now set a couple of colors for StumpWM. Not that we will see them often since I don’t like borders on my windows, but in case I want to get them back, they’ll be nice to have.
(set-border-color        phundrak-nord1)
(set-focus-color         phundrak-nord1)
(set-unfocus-color       phundrak-nord3)
(set-float-focus-color   phundrak-nord1)
(set-float-unfocus-color phundrak-nord3)Let’s also set the colors of the message and input windows:
(set-fg-color phundrak-nord4)
(set-bg-color phundrak-nord1)
As I said, I don’t like borders, so I’ll remove them. I’ll still keep the window’s title bar available when it’s floating, and this is also where I can set the format of its title: its number as well as its name, limited to thirty characters.
(setf *normal-border-width*       0
      ,*float-window-border*       0
      ,*float-window-title-height* 15
      ,*window-border-style*       :none
      ,*window-format*             "%n:%t")
I also have a StumpWM fork that introduces two new variables for customizing which-key keybindings. I submitted a pull request, so it might come one day to StumpWM.
(setf *key-seq-color* "^2")
(setf *which-key-format* (concat *key-seq-color* "*~5a^n ~a"))
Message and Input Windows
The Input windows as well as the message windows should both be at the top of my screen. And I believe a padding of five pixels for the message windows is good.
(setf *input-window-gravity*     :top
      ,*message-window-padding*   10
      ,*message-window-y-padding* 10
      ,*message-window-gravity*   :top)
Gaps Between Frames
I love gaps. When I was using i3, I used the i3-gaps package, not just
plain i3. In Awesome, I still have gaps. And in StumpWM, I shall still
use gaps. In order to use them, let’s load a module dedicated to gaps
in StumpWM:
(load-module "swm-gaps")Now that this is done, I can now set some variables bound to this package.
(setf swm-gaps:*head-gaps-size*  0
      swm-gaps:*inner-gaps-size* 5
      swm-gaps:*outer-gaps-size* 10)
Finally, let’s enable our gaps:
(when *initializing*
  (swm-gaps:toggle-gaps))
Utilities
Part of my configuration is not really related to StumpWM itself, or
rather it adds new behavior StumpWM doesn’t have. utilities.lisp
stores all this code in one place.
Binwarp
Binwarp allows the user to control their mouse from the keyboard, basically eliminating the need for a physical mouse in daily usage of the workstation (though a physical mouse stays useful for games and such).
(load-module "binwarp")
Next, I’ll define my keybinds for when using Binwarp for emulating
mouse clicks as well as bépo-compatible mouse movements. This new
Binwarp mode is now available from the keybind s-m at top level.
(binwarp:define-binwarp-mode my-binwarp-mode "s-m" (:map *top-map*)
    ((kbd "SPC") "ratclick 1")
    ((kbd "RET") "ratclick 3")
    ((kbd "c")   "binwarp left")
    ((kbd "t")   "binwarp down")
    ((kbd "s")   "binwarp up")
    ((kbd "r")   "binwarp right")
    ((kbd "i")   "init-binwarp")
    ((kbd "q")   "exit-binwarp"))
Bluetooth
Although there is a bluetooth module for the modeline, this is about the extent to which StumpWM can interact with the system’s bluetooth. However, I wish for some more interecactivity, like powering on and off bluetooth, connecting to devices and so on.
First, out code relies on cl-ppcre, so let’s quickload it.
(ql:quickload :cl-ppcre)Let’s indicate which command we’ll be using.
(defvar *bluetooth-command* "bluetoothctl"
  "Base command for interacting with bluetooth.")
Utilities
We’ll need a couple of functions that will take care of stuff for us
so we don’t have to repeat ourselves. The first one is a way for us to
share a message. The function bluetooth-message will first display
Bluetooth: in green, then it will display the message we want it to
display.
(defun bluetooth-message (&rest message)
  (message (format nil
                   "^2Bluetooth:^7 ~{~A~^ ~}"
                   message)))
This function is a builder function which will create our commands.
For instance, src_lisp[:exports code]{(bluetooth-make-command "power"
"on")} will return "bluetoothctl power on" with *bluetooth-ctl* set as
"bluetoothctl" — simply put, it joins *bluetooth-command* with args
with a space as their separator.
(defun bluetooth-make-command (&rest args)
  (format nil
          "~a ~{~A~^ ~}"
          ,*bluetooth-command*
          args))
Now we can put bluetooth-make-command to use with bluetooth-command
which will actually run the result of the former. As you can see, it
also collects the output so we can display it later in another
function.
(defmacro bluetooth-command (&rest args)
  `(run-shell-command (bluetooth-make-command ,@args) t))
Finally, bluetooth-message-command is the function that both executes
and also displays the result of the bluetooth command we wanted to see
executed. Each argument of the command is a separate string. For
instance, if we want to power on the bluetooth on our device, we can
call src_lisp[:exports code]{(bluetooth-message-command "power"
"on")}.
(defmacro bluetooth-message-command (&rest args)
  `(bluetooth-message (bluetooth-command ,@args)))
Toggle Bluetooth On and Off
This part is easy. Now that we can call our bluetooth commands easily, we can easily define how to turn on bluetooth.
(defcommand bluetooth-turn-on () ()
            "Turn on bluetooth."
            (bluetooth-message-command "power" "on"))
And how to power it off.
(defcommand bluetooth-turn-off () ()
            "Turn off bluetooth."
            (bluetooth-message-command "power" "off"))
Bluetooth Devices
In order to manipulate bluetooth device, which we can represent as a
MAC address and a name, we can create a structure that will make use
of a constructor for simpler use. The constructor
make-bluetooth-device-from-command expects an entry such as Device
00:00:00:00:00:00 Home Speaker. The constructor discards the term
Device and stores the MAC address separately from the rest of the
string which is assumed to be the full name of the device.
(defstruct (bluetooth-device
             (:constructor
              make-bluetooth-device (&key (address "")
                                          (name nil)))
             (:constructor
              make-bluetooth-device-from-command
              (&key (raw-name "")
               &aux (address (cadr (cl-ppcre:split " " raw-name)))
                    (full-name (format nil "~{~A~^ ~}" (cddr (cl-ppcre:split " " raw-name)))))))
  address
  (full-name (progn
                 (format nil "~{~A~^ ~}" name))))
We can now collect our devices easily.
(defun bluetooth-get-devices ()
  (let ((literal-devices (bluetooth-command "devices")))
    (mapcar (lambda (device)
              (make-bluetooth-device-from-command :raw-name device))
     (cl-ppcre:split "\\n" literal-devices))))
Connect to a device
When we want to connect to a bluetooth device, we always need
bluetooth turned on, so bluetooth-turn-on will always be called. Then
the function will attempt to connect to the device specified by the
device argument, whether the argument is a bluetooth structure as
defined above or a plain MAC address.
(defun bluetooth-connect-device (device)
  (progn
    (bluetooth-turn-on)
    (cond ((bluetooth-device-p device) ;; it is a bluetooth-device structure
           (bluetooth-message-command "connect"
                                      (bluetooth-device-address device)))
          ((stringp device)            ;; assume it is a MAC address
           (bluetooth-message-command "connect" device))
          (t (message (format nil "Cannot work with device ~a" device))))))
The command to connect to a device displays a choice between the collected bluetooth device and the user only has to select it. It will then attempt to connect to it.
(defcommand bluetooth-connect () ()
  (let* ((devices (bluetooth-get-devices))
         (choice  (cdr (stumpwm:select-from-menu
                        (stumpwm:current-screen)
                        (mapcar (lambda (device)
                                  `(,(bluetooth-device-full-name device) . ,device))
                                devices)))))
    (bluetooth-connect-device choice)))
Keybinds
It’s all nice and all, but typing manually the commands with s-SPC ;
is a bit tiring, so let’s define our bluetooth keymap which we will
bind to s-SPC B.
| Keychord | Command |
|---|---|
c |
bluetooth-connect |
o |
bluetooth-turn-on |
O |
bluetooth-turn-off |
(defvar *my-bluetooth-keymap*
  (let ((m (make-sparse-keymap)))
    <<keybinds-gen(map="m", keybinds=bluetooth-keymap)>>
    m))

(define-key *root-map* (kbd "B") '*my-bluetooth-keymap*)
NetworkManager integration
It is possible to have some kind of integration between StumpWM and NetworkManager. To do so, we have to load the related module, then create the two keybinds described in /phundrak/dotfiles/src/commit/2dfabd7d564d6dab28212b3f530b2343eb72b6d8/org/config/nm-keybinds.
| Keychord | Command |
|---|---|
W |
nm-list-wireless-networks |
*my-nm-keybinds*
A call to
(ql:quickload :dbus)dbus module in turn requires the
library libfixposix installed on the user’s machine. On Arch, you can
install it like so using paru:
paru -S libfixposix --noconfirm(ql:quickload :dbus)
(load-module "stump-nm")
<<keybinds-gen(map="*root-map*", keybinds=nm-keybinds)>>Notifications
No need for dunst or something like that, the contrib modules of
StumpWM have got us covered! Simply load the module and toggle the
server on.
(load-module "notify")

(notify:notify-server-toggle)
I don’t like the default colors of the notifications though, let’s change that.
(load "~/.stumpwm.d/colors.lisp")

(setf notify:*notify-server-title-color* "^2"
      notify:*notify-server-body-color* "^7")
Pinentry
Out with GTK2’s pinentry program! Let’s use StumpWM’s! At least that’s what I’d like to say, but unfortunately there is a bug in the text reading devices of StumpWM that prevent the user from using modifiers when entering a password such as AltGr, so I can’t use it : /
;; (load-module "pinentry")Sly
Sly is a fork of SLIME with which I can connect StumpWM and Emacs
together. Technically this is already done to some level with
stumpwm-mode, but the latter doesn’t provide auto-completion or stuff
like that.
The first thing to do is load slynk, SLY’s server:
(ql:quickload :slynk)Now we can define a command to launch the server. I don’t want it to run all the time, just when I need it.
(stumpwm:defcommand start-sly-server () ()
  "Start a SLYNK server for SLY"
  (slynk:create-server :dont-close t))
swm-ssh
This module from the contrib repository scans the user’s ssh configuration file and offers them a quick way of connecting to their remote hosts.
(load-module "swm-ssh")
The default terminal needs to be set, otherwise the module will try to
call urxvtc which is not installed on my system.
(setq swm-ssh:*swm-ssh-default-term* "kitty")Now, to call the main command of this module we can define the following keybind.
(define-key *root-map* (kbd "s") "swm-ssh-menu")Keybinds
Buckle up, this chapter is going to be long, because me loves LOTS of keybinds.
First, let’s declare again we are using the default package stumpwm:
(in-package :stumpwm)
This will avoid us always repeating stumpwm:define-key or stumpwm:kbd
instead of simply define-key and kbd.
StumpWM behaves a bit like Emacs in terms of keybinds. You have keymaps, which are a collection of keybinds, which in turn call CLisp functions. However, unlike Emacs, you have to declare a lot of keymaps, because StumpWM cannot (yet) understand keybinds such as
(kbd "C-x c l")There are also two keymaps you need to be aware of:
-
*top-map* - This is the keymap available litteraly everywhere. With
this keymap, you can emulate most of your keybinds you have in other
window managers. For instance, I cannot live without
s-RETfor creating new shells, so I’ll bind it to*top-map*. But it’s good practice to avoid polluting*top-map*with too many keybinds. -
*root-map* - This keymap is the default keymap that is already
somewhat populated. It is available after hitting the prefix key set
with
set-prefix-keywhich we will see just below.
It is interesting to note that once you entered any keymap, except
*top-map*, if you hit ? you will see the list of available keybinds.
I’d like it if something similar to general in Emacs too could be
implemented: give any arbitrary name to the keybind you just declared
which would be displayed instead of the actual function or keymap
called by keybind. It would be nicer to see frames rather than
*my-frames-management-keymap*.
Anyways, as mentionned above, *root-map* is already pre-populated with
some cool stuff for you, and you can access it with a prefix which is
by default C-t. But if this doesn’t suit you, you can always redefine
it with set-prefix-key. I personally like to have my space key as a
leader key, but in order to not have it conflict with Emacs, I also
need to press the super key too.
(set-prefix-key (kbd "s-SPC"))
Also, let’s enable which-key:
(which-key-mode)
Lastly, before we get more into details, keep in mind that I use the
bépo layout, as I often say in my different documents. This means the
characters found in the numbers’ row when pressing shift are actually
the numbers themselves. Also, some characters are not recognized as is
by kbd, so we need to use a special name (not fun…). Below are the
following characters:
| Number | Character | Lisp Character |
|---|---|---|
| 1 | " |
|
| 2 | « |
guillemotleft |
| 3 | » |
guillemotright |
| 4 | ( |
|
| 5 | ) |
|
| 6 | @ |
|
| 7 | + |
|
| 8 | - |
|
| 9 | / |
|
| 0 | * |
So if you see any weird keybind involving these characters, this is because of my layout.
Applications
When I speak about applications, I speak about programs and scripts in general. With these keymaps, I can launch programs I often have use for, but I can also launch some scripts as well as take screenshots.
First, let’s create my rofi scripts keymap.
| Keychord | Function |
|---|---|
a |
exec awiki |
r |
exec rofi -combi-modi drun,window -show combi |
s |
exec rofi -show ssh |
p |
exec rofi-pass -t |
P |
exec rofi-pass |
e |
exec rofi-emoji |
m |
exec rofi-mount |
u |
exec rofi-umount |
w |
exec wacom-setup |
y |
exec ytplay |
Y |
exec rofi-ytdl |
*my-rofi-keymap*
Here’s the equivalent in Common Lisp.
(defvar *my-rofi-keymap*
  (let ((m (make-sparse-keymap)))
    <<keybinds-gen(map="m", keybinds=rofi-scripts)>>
m))Let’s also create a keymap for screenshots.
| Keychord | Function |
|---|---|
d |
exec scrot -d 3 -e 'post-scrot $f' |
s |
exec scrot -e 'post-scrot $f' |
S |
exec scrot -s -e 'post-scrot $f' |
g |
exec scrot -e 'gimp $f; post-scrot $f' |
*my-screenshot-keymap*
Here’s the equivalent in Common Lisp.
(defvar *my-screenshot-keymap*
  (let ((m (make-sparse-keymap)))
    <<keybinds-gen(map="m", keybinds=screenshot-keymap)>>
    m))
We can now define our applications keymap which will reference both the above keymaps.
| Keychord | Function |
|---|---|
b |
firefox |
d |
exec discord-canary |
e |
exec emacsclient -c |
g |
exec gimp |
n |
exec nemo |
r |
'*my-rofi-keymap* |
s |
'*my-screenshot-keymap* |
w |
exec select-pape |
*my-applications-keymap*
This translates to:
(defvar *my-applications-keymap*
  (let ((m (make-sparse-keymap)))
    <<keybinds-gen(map="m", keybinds=application-keymap)>>
    m))
The application keymap can now be bound to the root map like so:
(define-key *root-map* (kbd "a") '*my-applications-keymap*)
I will also bind to the top map s-RET in order to open a new terminal
window. The screenshot keymap is also bound to the ScreenPrint key.
(define-key *top-map* (kbd "s-RET") "term")
(define-key *top-map* (kbd "Print") '*my-screenshot-keymap*)
End of Session, Powering Off, and the Likes
The module end-session provides functions for gracefully ending the
user session, powering off, restarting, and suspending the computer.
It also provides a function that interactively asks what the user
whishes to do.
| Keychord | Function |
|---|---|
q |
end-session |
l |
logout |
s |
suspend-computer |
S |
shutdown-computer |
r |
loadrc |
R |
restart-hard |
C-r |
restart-computer |
This translates to:
(defvar *my-end-session-keymap*
  (let ((m (make-sparse-keymap)))
    <<keybinds-gen(map="m", keybinds=end-session-keymap)>>
    m))
Which is bound in the root map to q:
(define-key *root-map* (kbd "q") '*my-end-session-keymap*)Groups
A basic keybind I need for groups is to be able to switch from one another. I’m very used to the ability of being able to jump between them with the keybind Super + number of the group, so let’s define this:
(mapconcat (lambda (group)
             (let ((group-nbr (nth 1 group)))
               (format "%S" `(define-key
                               ,(make-symbol map)
                               (kbd ,(format "%s-%s"
                                             mod
                                             (if (string= "yes" convert)
                                                 (format "<<num-to-char(num=%s)>>" group-nbr)
                                               (number-to-string group-nbr))))
                               ,(format "%s %d" action group-nbr)))))
           groups
           "\n")
"(define-key *top-map* (kbd \"s-1\") \"gselect 1\") (define-key *top-map* (kbd \"s-2\") \"gselect 2\") (define-key *top-map* (kbd \"s-3\") \"gselect 3\") (define-key *top-map* (kbd \"s-4\") \"gselect 4\") (define-key *top-map* (kbd \"s-5\") \"gselect 5\") (define-key *top-map* (kbd \"s-6\") \"gselect 6\") (define-key *top-map* (kbd \"s-7\") \"gselect 7\") (define-key *top-map* (kbd \"s-8\") \"gselect 8\")"
<<group-keybind-gen(mod="s", action="gselect", convert="yes")>>(define-key *top-map* (kbd "s-<<num-to-char(num=1)>>") "gselect 1")
(define-key *top-map* (kbd "s-<<num-to-char(num=2)>>") "gselect 2")
(define-key *top-map* (kbd "s-<<num-to-char(num=3)>>") "gselect 3")
(define-key *top-map* (kbd "s-<<num-to-char(num=4)>>") "gselect 4")
(define-key *top-map* (kbd "s-<<num-to-char(num=5)>>") "gselect 5")
(define-key *top-map* (kbd "s-<<num-to-char(num=6)>>") "gselect 6")
(define-key *top-map* (kbd "s-<<num-to-char(num=7)>>") "gselect 7")
(define-key *top-map* (kbd "s-<<num-to-char(num=8)>>") "gselect 8")
Another batch of keybinds I use a lot is keybinds to send the
currently active window to another group, using Super + Shift + number
of the group. As mentioned before, due to my keyboard layout Shift +
number is actually just number for me (e.g. Shift + " results in 1),
so there’s no need to convert the group number to another character.
<<group-keybind-gen(mod="s", action="gmove-and-follow", convert="no")>>(define-key *top-map* (kbd "s-1") "gmove-and-follow 1")
(define-key *top-map* (kbd "s-2") "gmove-and-follow 2")
(define-key *top-map* (kbd "s-3") "gmove-and-follow 3")
(define-key *top-map* (kbd "s-4") "gmove-and-follow 4")
(define-key *top-map* (kbd "s-5") "gmove-and-follow 5")
(define-key *top-map* (kbd "s-6") "gmove-and-follow 6")
(define-key *top-map* (kbd "s-7") "gmove-and-follow 7")
If I want to send a window to another group without following it, I’ll
use s-S-C-<group number>, which gives us the following:
<<group-keybind-gen(mod="s-C", action="gmove-and-follow", convert="no")>>(define-key *top-map* (kbd "s-C-1") "gmove-and-follow 1")
(define-key *top-map* (kbd "s-C-2") "gmove-and-follow 2")
(define-key *top-map* (kbd "s-C-3") "gmove-and-follow 3")
(define-key *top-map* (kbd "s-C-4") "gmove-and-follow 4")
(define-key *top-map* (kbd "s-C-5") "gmove-and-follow 5")
(define-key *top-map* (kbd "s-C-6") "gmove-and-follow 6")
(define-key *top-map* (kbd "s-C-7") "gmove-and-follow 7")
And if I want to bring the windows of another group into the current
group, I’ll use s-C-<group number>:
(define-key *top-map* (kbd "s-C-<<num-to-char(num=1)>>") "gmove-and-follow 1")
(define-key *top-map* (kbd "s-C-<<num-to-char(num=2)>>") "gmove-and-follow 2")
(define-key *top-map* (kbd "s-C-<<num-to-char(num=3)>>") "gmove-and-follow 3")
(define-key *top-map* (kbd "s-C-<<num-to-char(num=4)>>") "gmove-and-follow 4")
(define-key *top-map* (kbd "s-C-<<num-to-char(num=5)>>") "gmove-and-follow 5")
(define-key *top-map* (kbd "s-C-<<num-to-char(num=6)>>") "gmove-and-follow 6")
(define-key *top-map* (kbd "s-C-<<num-to-char(num=7)>>") "gmove-and-follow 7")
StumpWM also has already a nice keymap for managing groups called
*groups-map*, so let’s bind it to *root-map* too! (It’s actually
already bound, but since I plan on erasing *root-map* in the near
future before binding stuff to it, I prefer to bind it already)
(define-key *root-map* (kbd "g") '*groups-map*)
And a binding to vgroups is done on *groups-map* in order to regroup
similar keybinds.
(define-key *groups-map* (kbd "G") "vgroups")
I grew accustomed to s-ESC bringing me to the previous group when
using AwesomeWM, so let’s define that:
(define-key *top-map* (kbd "s-ESC") "gother")Frames and Windows management
As you’ll see, I have loads of keybinds related to frames and windows
management. They are all categorized in a specific keymap, called
*my-frames-management-keymap*. But before that, let’s define the
keymap *my-frames-float-keymap*, with keybinds dedicated to actions
related with floating windows and frames.
| Keychord | Function |
|---|---|
f |
float-this |
F |
unfloat-this |
u |
unfloat-this |
C-f |
flatten-floats |
*my-frames-float-keymap*
We can now pass onto *my-frames-management-keymap*. My keybinds are organized this way:
| Keychord | Function |
|---|---|
c |
move-focus left |
t |
move-focus down |
s |
move-focus up |
r |
move-focus right |
C |
move-window left |
T |
move-window down |
S |
move-window up |
R |
move-window right |
C-c |
exchange-direction left |
C-t |
exchange-direction down |
C-s |
exchange-direction up |
C-r |
exchange-direction right |
/ |
hsplit-and-focus |
- |
vsplit-and-focus |
h |
hsplit |
v |
vsplit |
H |
hsplit-equally |
V |
vsplit-equally |
. |
iresize |
+ |
balance-frames |
d |
remove-split |
D |
only |
e |
expose |
f |
fullscreen |
F |
'*my-frames-float-keymap* |
i |
info |
I |
show-window-properties |
m |
meta |
s |
sibling |
u |
next-urgent |
U |
unmaximize |
*my-frames-management-keymap*
As you can see, with the binding to F, we make use of the
*my-frames-float-keymap* keymap declared above, which means if we find
ourselves in *my-frames-management-keymap*, pressing F will bring us
in *my-frames-float-keymap*.
(defvar *my-frames-float-keymap*
  (let ((m (make-sparse-keymap)))
    <<keybinds-gen(map="m", keybinds=frames-float)>>
    m))

(defvar *my-frames-management-keymap*
  (let ((m (make-sparse-keymap)))
    <<keybinds-gen(map="m", keybinds=frames-and-window-management)>>
    m))
Let’s bind *my-frames-management-keymap* in *root-keymap*:
(define-key *root-map* (kbd "w") '*my-frames-management-keymap*)
That way, if we want for instance to split our current frame
vertically, we’ll be able to type s-SPC w - and vsplit will be called.
I also bound a couple of these functions to the top keymap for easier access:
| Keychord | Function |
|---|---|
s-c |
move-focus left |
s-t |
move-focus down |
s-s |
move-focus up |
s-r |
move-focus right |
s-C |
move-window left |
s-T |
move-window down |
s-S |
move-window up |
s-R |
move-window right |
s-M-c |
exchange-direction left |
s-M-t |
exchange-direction down |
s-M-s |
exchange-direction up |
s-M-r |
exchange-direction right |
This translates to:
<<keybinds-gen(map="*top-map*", keybinds=top-window-map)>>
Being a bépo layout user, the hjkl keys don’t exactly fit me, as you
might have noticed with my use of ctsr which is its equivalent. Due to
this, the interactive keymap for iresize is not ideal for me, let me
redefine it:
(define-interactive-keymap (iresize tile-group) (:on-enter #'setup-iresize
                                                 :on-exit  #'resize-unhide
                                                 :abort-if #'abort-resize-p)
  ((kbd "c") "resize-direction left")
  ((kbd "t") "resize-direction down")
  ((kbd "s") "resize-direction up")
  ((kbd "r") "resize-direction right"))
As with groups management, I grew used to s-TAB in AwesomeWM bringing
me back to the previously focused window.
(define-key *top-map* (kbd "s-TAB") "other-window")Windows management
When it comes to windows management, I will treat them a bit like I do with Emacs’ buffers.
| Keychord | Function |
|---|---|
b |
windowlist |
d |
delete-window |
D |
window-window-and-frame |
k |
kill-window |
n |
next |
o |
other-window |
p |
prev |
*my-buffers-management-keymap*
(defvar *my-buffers-management-keymap*
  (let ((m (make-sparse-keymap)))
    <<keybinds-gen(map="m", keybinds=window-management)>>
    m))

(define-key *root-map* (kbd "b") '*my-buffers-management-keymap*)
Media and Media Control
My music is managed through MPD, and I often use mpc commands in order
to interact with it without any GUI application. So, we’ll see a lot
of its usage here, and numerous commands used here come from the mpd
minor mode loaded above.
First, let’s declare an interactive keymap in order to easily change several times in a row either the current song playing or the volume of MPD.
| Keychord | Function |
|---|---|
c |
mpd-prev |
t |
mpd-volume-down |
s |
mpd-volume-up |
r |
mpd-next |
mpc
This can be translated in CommonLisp as:
<<interactive-gen(name="mpc-interactive", keys=inter-mpc)>>
We need to indicate also how much the volume is affected by
mpd-volume-down and mpd-volume-up.
(setf *mpd-volume-step* 2)Another one will be defined for the general audio of my computer. And I know it isn’t technically media keybinds, but I’ll add in keybinds for my screen’s backlight.
| Keys | Function |
|---|---|
c |
exec xbacklight -dec 2 |
t |
exec amixer -q set Master 2%- unmute |
s |
exec amixer -q set Master 2%+ unmute |
r |
exec xbacklight -inc 2 |
m |
exec amixer -q set Master 1+ toggle |
<<interactive-gen(name="media-interactive", keys=inter-media)>>Then, let’s declare a keymap for our media controls.
| Keychord | Function |
|---|---|
a |
mpd-search-and-add-artist |
A |
mpd-search-and-add-album |
f |
mpd-search-and-add-file |
F |
mpd-add-file |
g |
mpd-search-and-add-genre |
t |
mpd-search-and-add-title |
*my-mpd-add-map*
| Keychord | Function |
|---|---|
a |
mpd-browse-artists |
A |
mpd-browse-albums |
g |
mpd-browse-genres |
p |
mpd-browse-playlist |
t |
mpd-browse-tracks |
*my-mpd-browse-map*
| Keychord | Function |
|---|---|
. |
media-interactive |
a |
'*my-mpd-add-map* |
b |
'*my-mpd-browse-map* |
c |
mpd-clear |
m |
mpc-interactive |
p |
mpd-prev |
n |
mpd-next |
P |
mpd-toggle-pause |
s |
mpd-stop |
u |
mpd-update |
N |
term ncmpcpp -q |
v |
term ncmpcpp -qs visualizer |
*my-media-keymap*
Let’s translate this table in CommonLisp:
(defvar *my-mpd-add-map*
  (let ((m (make-sparse-keymap)))
    <<keybinds-gen(map="m", keybinds=mpd-add-map)>>
    m))

(defvar *my-mpd-browse-map*
  (let ((m (make-sparse-keymap)))
    <<keybinds-gen(map="m", keybinds=mpd-browse-map)>>
    m))

(defvar *my-media-keymap*
  (let ((m (make-sparse-keymap)))
    <<keybinds-gen(map="m", keybinds=media-management)>>
    m))

(define-key *root-map* (kbd "m") '*my-media-keymap*)
I will also define on *top-map* some basic volume management keybinds
so that they are immediately accessible. Again, this isn’t technically
media-related, but I’ll add keybinds for my screen’s backlight.
| Keychord | Function |
|---|---|
XF86AudioPlay |
mpd-play |
XF86AudioPause |
exec mpc pause |
XF86AudioPrev |
mpd-prev |
XF86AudioNext |
mpd-next |
XF86AudioRaiseVolume |
exec amixer -q set Master 2%+ unmute |
XF86AudioLowerVolume |
exec amixer -q set Master 2%- unmute |
XF86AudioMute |
exec amixer -q set Master 1+ toggle |
XF86MonBrightnessDown |
exec xbacklight -dec 2 |
XF86MonBrightnessUp |
exec xbacklight -inc 2 |
<<keybinds-gen(map="*top-map*", keybinds=media-top-level)>>Misc
Finally, some misc keybinds on the root map which don’t really fit anywhere else:
| Keychord | Function |
|---|---|
B |
beckon |
C-b |
banish |
l |
exec plock |
r |
reload |
<<keybinds-gen(map="*root-map*", keybinds=misc-root-map)>>
From time to time, I need to switch between different keyboard
layouts, especially to the US Qwerty layout when I’m playing some
games and the bépo layout most of the time. I’ll use the command
switch-layout defined above.
| Keychord | Function |
|---|---|
b |
exec setxkbmap fr bepo_afnor |
u |
exec setxkbmap us |
(defvar *my-keyboard-layout-keymap*
  (let ((m (make-sparse-keymap)))
    <<keybinds-gen(map="m", keybinds=keyboard-layout-map)>>
    m))

(define-key *root-map* (kbd "k") '*my-keyboard-layout-keymap*)